Imagine a scoop of ice cream so rich, so velvety, and so intensely chocolatey that it transports you straight to a gourmet creamery, all from the comfort of your own home. This isn't just any sweet treat; it's the ultimate homemade chocolate ice cream experience. Forget bland, icy versions – we're talking about an ultra-creamy confection that boasts a deep, complex chocolate flavor, a texture that melts languidly on your tongue, and an undeniable allure that makes it truly irresistible. Making the best homemade chocolate ice cream is a rewarding culinary adventure, and with our expert guidance, you’re about to unlock perfection. This recipe uses a thoughtful combination of seven key ingredients, including two forms of chocolate, to deliver a result that’s as good, if not better, than anything you’d buy.
The Secret to Unparalleled Creaminess and Deep Chocolate Flavor
What truly sets exceptional chocolate ice cream apart from the rest? It boils down to a few critical components and a meticulous process designed to maximize flavor and texture. Our journey to ultra-creamy perfection begins with understanding the roles of the superstar ingredients:
- Heavy Cream: This is the backbone of creaminess. Its high-fat content is non-negotiable for achieving that luxurious, melt-in-your-mouth texture that defines premium ice cream. There's truly no adequate substitute if you're aiming for the highest standard of richness.
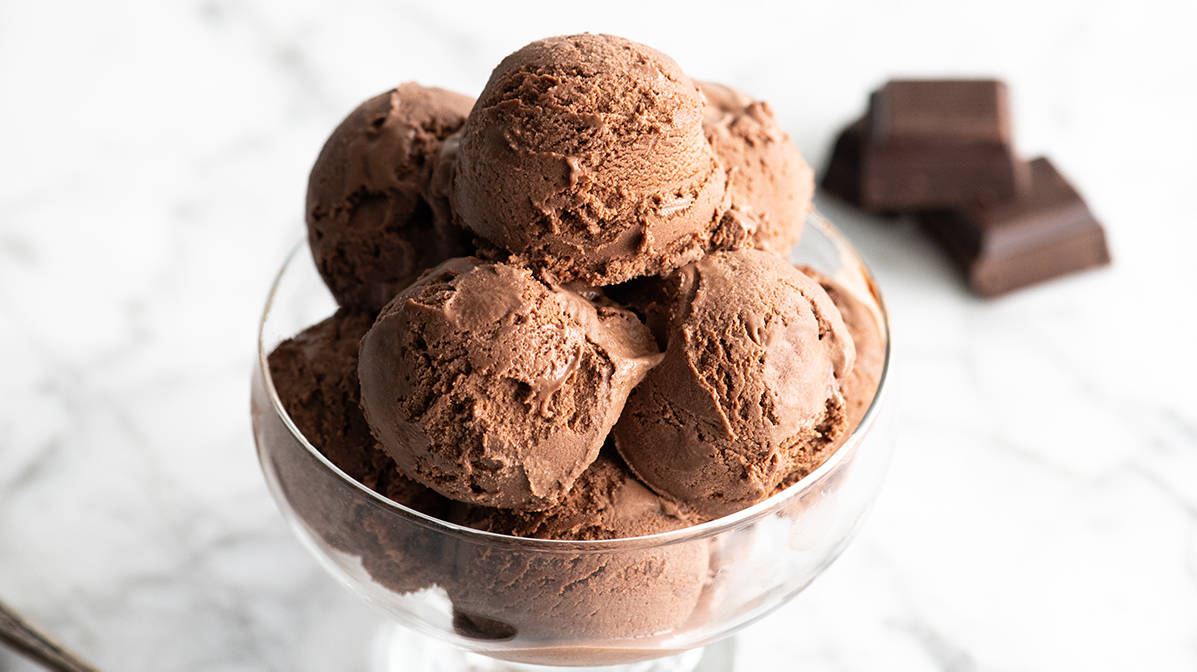
- Two Forms of Chocolate: This is a game-changer for flavor depth. We use both cocoa powder and solid chocolate (like semisweet chocolate chips or bars). The cocoa powder provides an earthy, robust chocolate base, while the solid chocolate adds a richer, smoother, and more nuanced chocolate essence, contributing to a truly decadent experience.
- Egg Yolks: Often overlooked by novices, egg yolks are the emulsification heroes. They bind the fat and water components of the mixture, preventing ice crystals from forming and creating an incredibly smooth, custardy texture that is the hallmark of premium French-style ice cream. Skipping them means sacrificing a significant portion of that coveted creaminess.
By leveraging these core ingredients, we build a foundation for a homemade chocolate ice cream that’s not just sweet, but deeply flavorful and wonderfully textured, proving that a little culinary insight can go a long way in achieving frozen dessert greatness.
Essential Ingredients for Your Culinary Masterpiece
Crafting the best homemade chocolate ice cream requires a precise selection of ingredients, each playing a vital role in the final product. Here’s a detailed look at what you’ll need and why:
- Heavy Cream: As mentioned, this is paramount for creaminess. Opt for heavy whipping cream with at least 36% milk fat. Substituting with lighter creams or milk will result in a less rich and potentially icier texture.
- Whole Milk: Whole milk complements the heavy cream by providing additional liquid and a creamy mouthfeel without making the base excessively thick. While 2% milk can be used, it will slightly diminish the overall creaminess. For best results, stick with whole milk.
- Cocoa Powder: This is your primary source of chocolate flavor. For a classic, rich chocolate taste, natural unsweetened cocoa powder is excellent. If you lean towards a very dark chocolate ice cream, consider using Dutch-process or even black cocoa powder for an intense, almost Oreo-like flavor.
- Semisweet Chocolate: We recommend 60% dark chocolate chips or a chopped semisweet chocolate bar. This adds a layer of sophisticated bitterness and depth that balances the sweetness. Feel free to adjust the percentage to your preference: milk chocolate will yield a sweeter ice cream, while darker chocolate will intensify the chocolate flavor.
- Granulated Sugar: Beyond sweetness, sugar contributes to the texture by lowering the freezing point of the ice cream, helping it stay softer and less icy. Organic cane sugar or regular white sugar works perfectly. There isn't a direct substitute that maintains both the sweetness and textural benefits.
- Egg Yolks: These are absolutely critical for a truly rich and creamy ice cream. They create an emulsified custard base, which is key to preventing ice crystal formation and achieving that luxurious, smooth texture. Do not omit them!
- Vanilla Extract: A touch of vanilla doesn't just add its own flavor; it enhances and deepens the chocolate notes, making them more vibrant and complex. For an elevated experience, vanilla bean paste or scraped vanilla bean seeds can be used.
- Pinch of Sea Salt: A small amount of salt is essential for balancing the sweetness and intensifying the chocolate flavor, making the ice cream taste even more profound and well-rounded.
Crafting Your Dream Scoop: Step-by-Step Perfection
While making homemade ice cream might seem daunting, it's a deeply satisfying process. Follow these steps for an ultra-creamy, profoundly chocolatey result.
Building the Velvety Chocolate Base
Your first step is to create a robust chocolate foundation. Begin by whisking together a portion of your heavy cream with the cocoa powder in a saucepan. This initial whisking helps to fully dissolve the cocoa, preventing lumps and ensuring a smooth, even chocolate distribution. Bring this mixture to a gentle boil, then reduce the heat and simmer for about 30 seconds, whisking constantly. This crucial step "blooms" the cocoa powder, intensifying its flavor. Remove from heat and stir in your chopped semisweet chocolate until completely melted and smooth. This creates a deeply flavored, rich chocolate essence. Whisk in the remaining heavy cream, ensuring everything is well combined.
Mastering the Silky Custard (Tempering Eggs)
Next, we prepare the custard, which will provide the unparalleled creaminess. In a separate medium bowl, whisk your egg yolks until they are light and frothy. In a clean saucepan, combine the whole milk, granulated sugar, and sea salt, and heat over medium heat until it's warm, but not boiling. Now comes the critical step of tempering: gradually ladle about ½ cup of the warm milk mixture into the beaten egg yolks, whisking continuously. This slowly brings the temperature of the yolks up without scrambling them. Once tempered, slowly pour the egg-milk mixture back into the saucepan with the remaining warm milk, whisking constantly. Continue to cook over medium-low heat, stirring constantly with a spatula, until the custard thickens slightly and coats the back of a spoon. Do not let it boil. Immediately remove from heat. For the silkiest texture imaginable, strain the finished custard through a fine-mesh sieve (or a nut milk bag/cheesecloth) into a large bowl. This catches any tiny bits of cooked egg or undissolved solids, ensuring a perfectly smooth and luxurious base. Combine this strained custard with your prepared chocolate base, whisking until fully integrated. As highlighted in our deep dive, Two Chocolates & Egg Yolks: Secret to Rich, Creamy Ice Cream, these components are fundamental.
Chilling, Churning, and Freezing for Flawless Texture
The chilling process is vital for the optimal performance of your ice cream maker. Transfer the combined chocolate custard base to an airtight container and refrigerate for at least 4-6 hours, or preferably overnight, until it is thoroughly chilled. A cold base ensures proper churning and prevents iciness. Once chilled, pour the mixture into your ice cream maker and churn according to the manufacturer's instructions. This usually takes about 20-30 minutes, resulting in a soft-serve consistency. For a firmer, scoopable ice cream, transfer the churned ice cream into a freezer-safe container and freeze for an additional 4-6 hours. While an ice cream maker is recommended for the best ultra-creamy texture, you can still enjoy delicious chocolate ice cream without a machine, though the texture may vary slightly.
Elevate Your Chocolate Ice Cream Experience
Once you’ve mastered the art of making this incredible homemade chocolate ice cream, the possibilities for enjoyment are endless. While it’s utterly divine on its own, here are a few suggestions to truly elevate your dessert experience:
- Classic Pairings: Serve a generous scoop alongside a warm slice of your favorite chocolate cake, a gooey brownie, or a giant chocolate chip cookie. The contrast in temperatures and textures is pure bliss.
- Gourmet Toppings: Drizzle with homemade hot fudge, sprinkle with flaky sea salt, toasted nuts, fresh raspberries, or a dollop of freshly whipped cream.
- Flavor Enhancements: Before churning, consider stirring in a teaspoon of espresso powder to deepen the chocolate flavor even further, a pinch of cayenne pepper for a subtle spicy kick, or a splash of rum or Kahlua for an adult twist.
- Storage Tips: Store your homemade chocolate ice cream in an airtight container in the coldest part of your freezer. To prevent freezer burn and keep it soft, press a piece of plastic wrap directly onto the surface of the ice cream before sealing the container. It’s best enjoyed within 1-2 weeks for optimal flavor and texture.
There's an undeniable magic in creating something so decadent and delicious from scratch. This comprehensive guide to making ultra-creamy homemade chocolate ice cream isn't just a recipe; it's an invitation to experience dessert perfection. From the careful selection of ingredients like heavy cream and two forms of chocolate, to the precise steps of tempering egg yolks and chilling the base, every detail contributes to a luxurious, rich, and intensely chocolatey scoop that rivals any ice cream parlor. So go ahead, gather your ingredients, fire up your ice cream maker, and prepare to delight your senses with the best homemade chocolate ice cream you’ve ever tasted. Your journey to frozen dessert bliss starts now!
